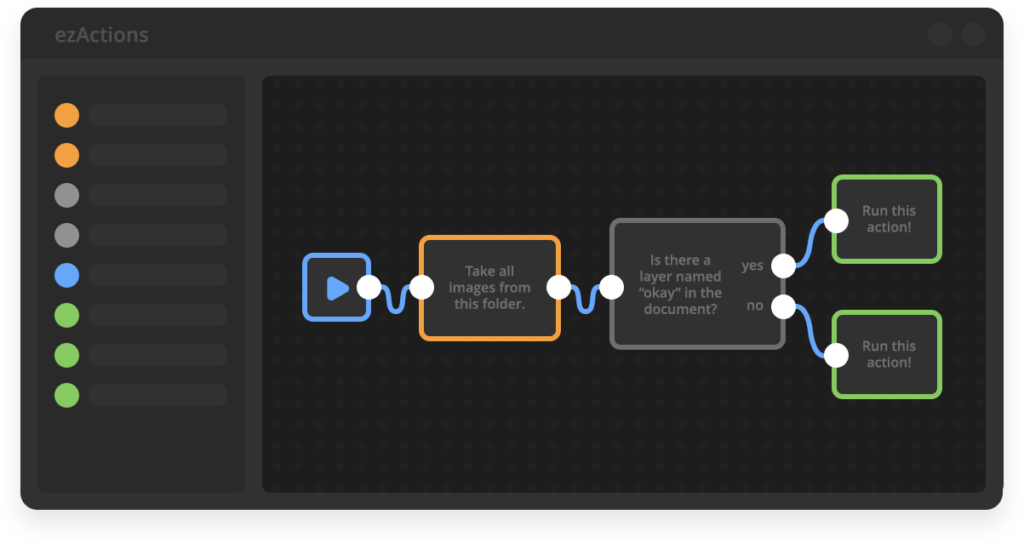
Now that you are familiar with the interface, it is time to build your first automation. In ezActions, a workflow is created by connecting different functional blocks, called Nodes, from left to right.
1. The Core Philosophy: “Read it like a sentence”
When designing ezActions, our main goal was to make automation accessible to everyone, especially non-programmers. We strictly follow one rule: A well-built workflow should read like a simple sentence.
By connecting nodes from left to right, you are essentially writing a story of what Photoshop should do for you.
- Example: Start (and then) For Each file in a folder Open Document (and) Resize it (and finally) Save Document.
2. The Basic Rule: Left to Right
Every workflow in ezActions flows horizontally. Data and commands start at the left and move to the right.
- Input Ports: The small white dots on the left side of a node receive information or a trigger.
- Output Ports: The dots on the right side send information or a trigger to the next node.
3. Adding and Connecting Nodes
To build a continuous chain of actions:
- Add Nodes: Click on the desired nodes in the left Node Library to add them to your canvas.
- Draw a Connection: Click and hold on an Output Port (right side) of one node, drag the wire, and release it on the Input Port (left side) of the next node.
- Removing Connections: If you made a mistake or want to rewire your workflow, simply click on the wire itself and press Delete (or Backspace) on your keyboard.
4. The Anatomy of a Basic Workflow
A standard, functional workflow usually consists of three main phases:
- The Trigger (Start): Every workflow must begin with a Start node. This is your play button and the beginning of your “sentence”.
- The Action (Middle): This is what you want Photoshop to do. It typically involves opening a file, applying changes (like Resize or Smart Object Replace), and processing logic.
- The Output (End): Usually, a workflow ends with a Save Document node to export your final image, or a Close Document node to keep your workspace clean.
Example of a basic chain: Start ➔ Select File(s) ➔ Open Document ➔ Smart Object Replace ➔ Save As
5. Saving Your Work
Always keep an eye on the top toolbar. If the Save icon is blue, you have unsaved changes. Clicking any field or moving a node will trigger this “unsaved” state. Click the icon to secure your workflow before clicking the “Back to Workflows” button.